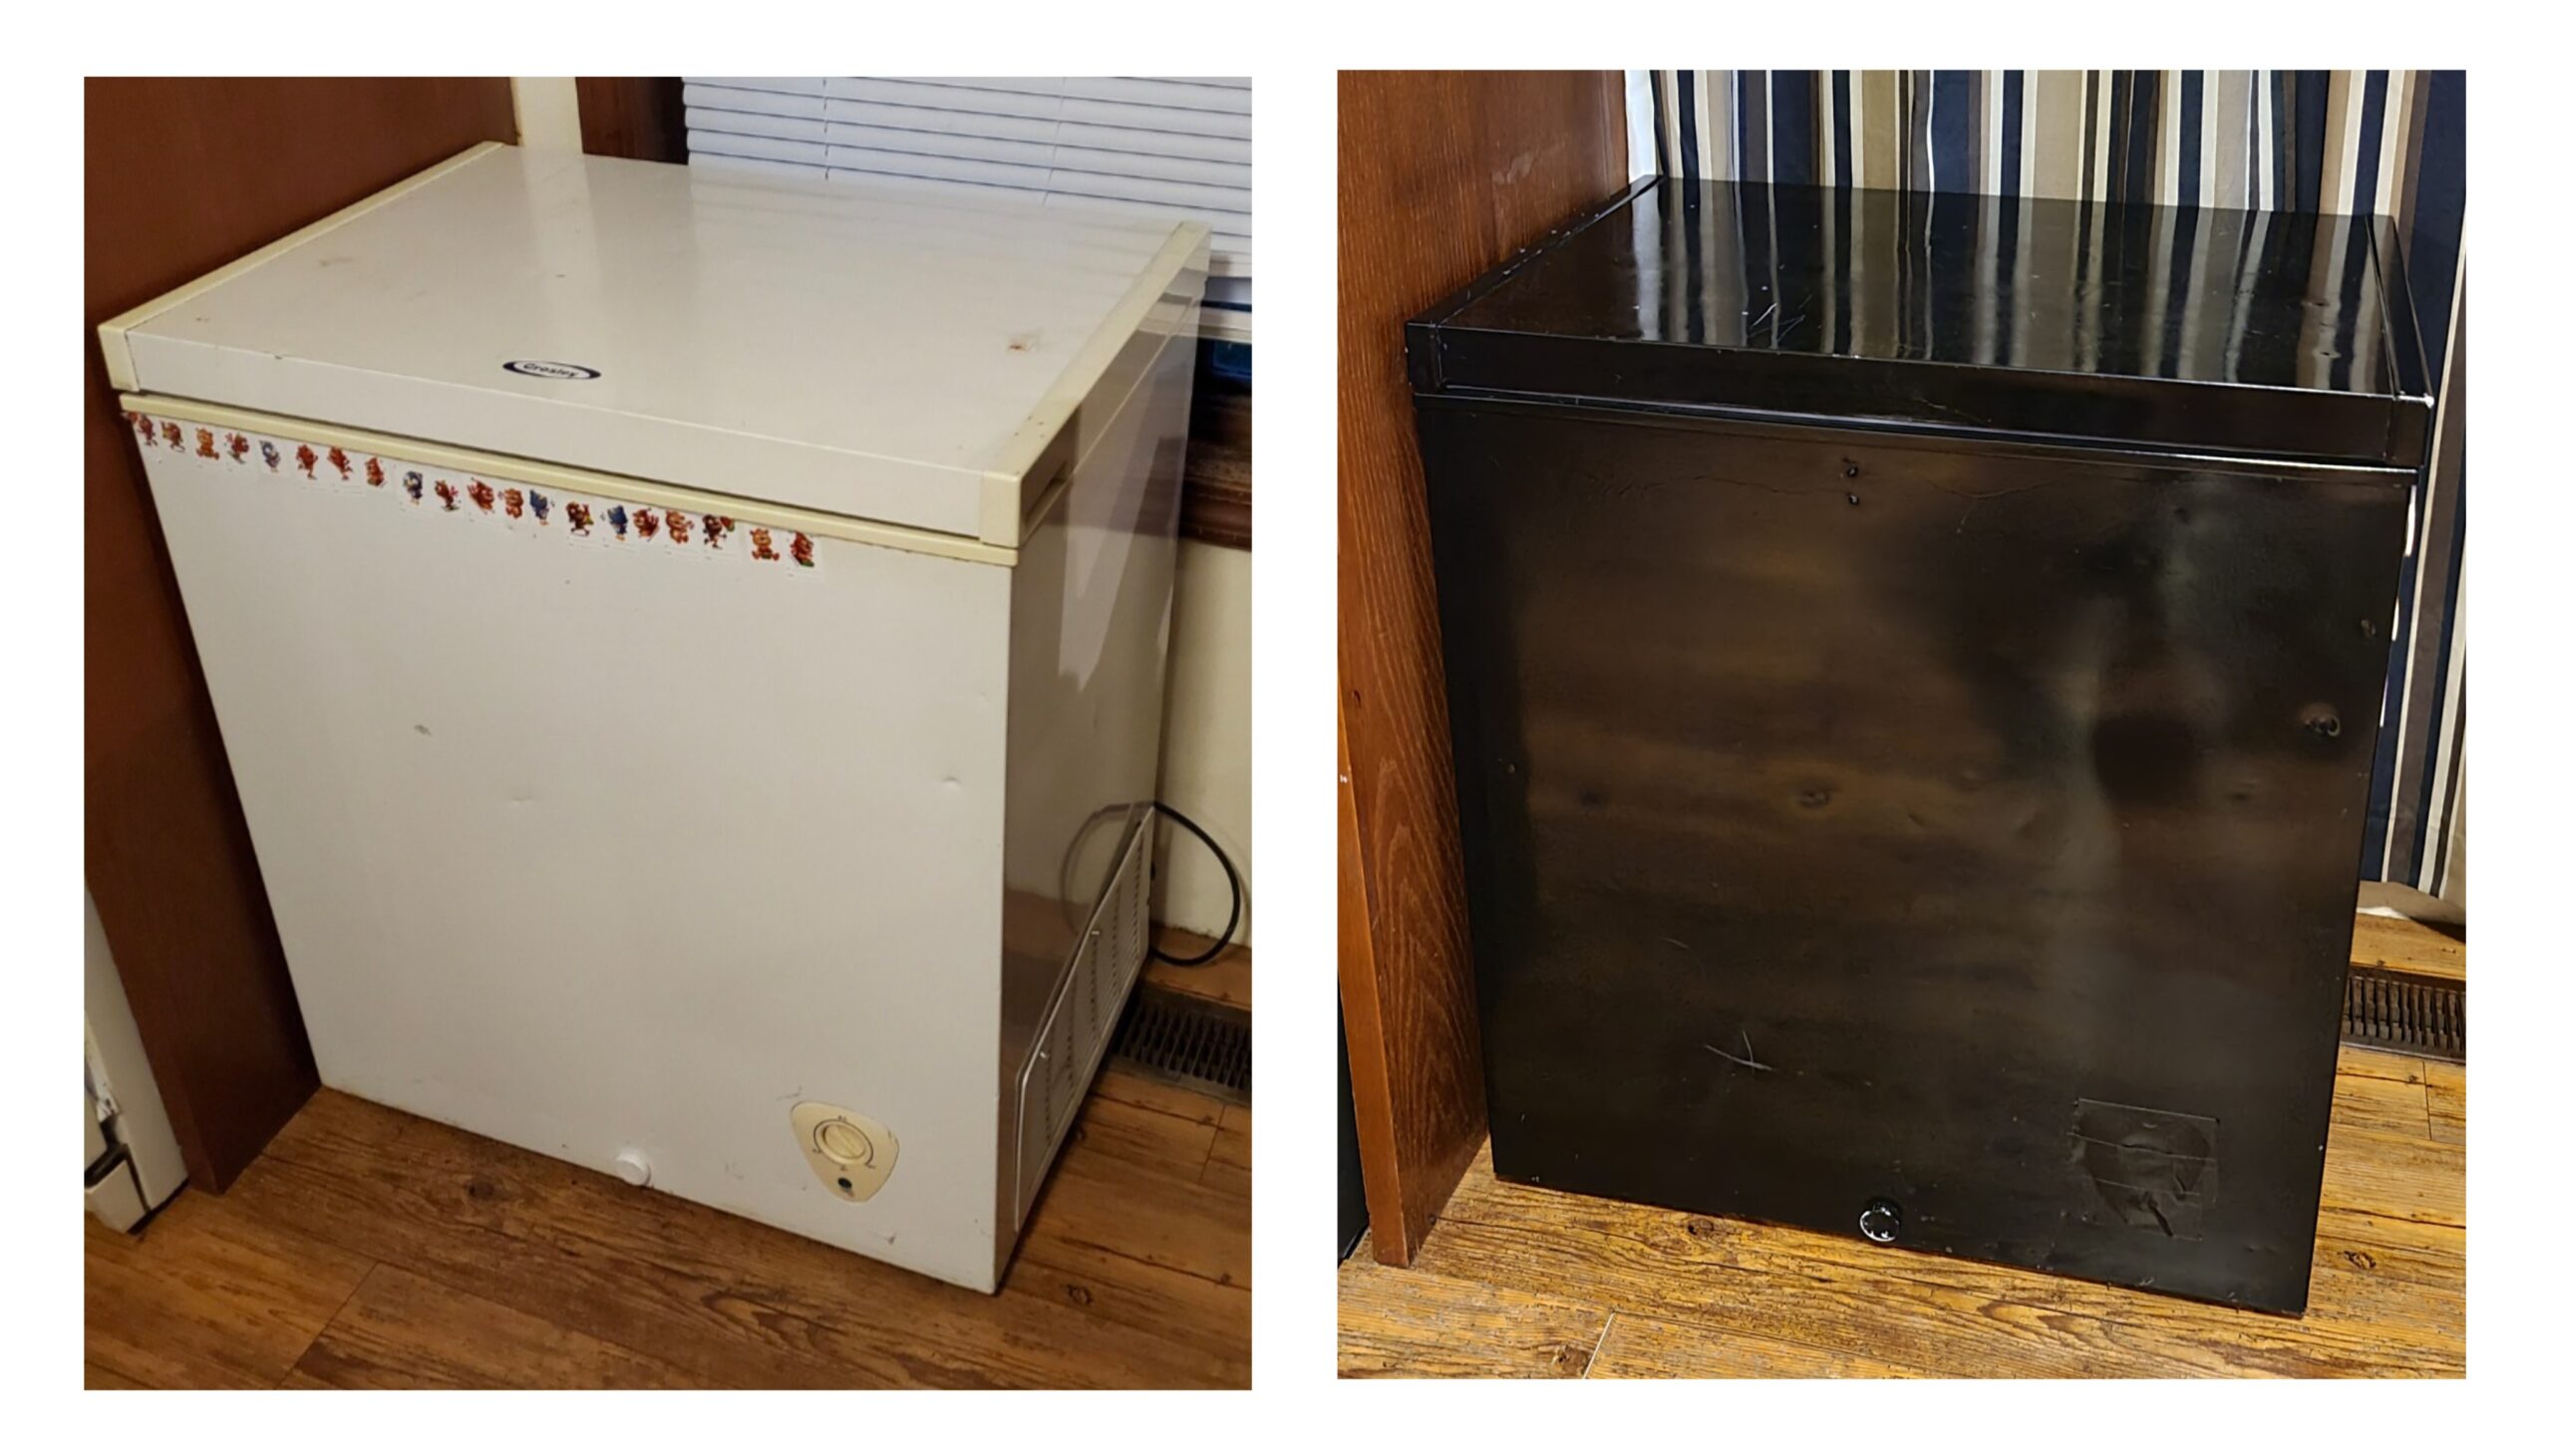

We spray painted this FREE chest freezer so it wouldn’t be such an eyesore in our kitchen.

One of the perks of living in a rural area is the ability to save money by buying meat in bulk from your farmer friends and neighbors. To start buying meat in bulk, we needed a way to store it. My parents gave us a solution in the form of this FREE chest freezer. It was scratched, dented, and the wrong color, but it was the right price! We decided that we could either put it out of sight in the garage or basement, or we could DIY to make it look like it belongs in our kitchen. DIY spray painted chest freezer? Sign me up!
Prep


Prep for this project was super fast and simple. First I scraped off all the stickers by getting them wet and scraping with my fingernail. A razor blade would be faster, but I didn’t have one. Then we needed to scuff the surface with some fine grit sandpaper so our paint would have a rough surface to stick to. I generally prefer to use sanding blocks, like the ones linked above, for hand sanding as it’s easier to hold onto than a piece of sandpaper. I hate sanding, but sanding blocks make it a little more comfortable and a little less awful. Once it was scuffed, we used Frog Tape (linked photo above) to tape off the control panel on the front and the rubber seals around the lid. Personally, I am a firm believer that Frog Tape is completely worth the price to get clean tape lines.
Paint

Next it was time to paint! My husband sprayed on 2 coats of glossy black paint (linked above). I didn’t do it myself because I always seem to have drips when I spray paint. As usual, I recommend a 2 in 1 paint and primer for better coverage with less coats. Looking back, I do wish I would have chosen a less glossy paint. Glossy paint tends to show more imperfections, and I think it made the dents in this old freezer a lot more noticeable.
Finishing Touches


Paint did this freezer a world of good, but that off-white control panel now stuck out like a sore thumb. I wish I could say I found an elegant solution for covering the control panel, but in reality I used black duct tape. It made the control panel blend in with the rest of this black, lumpy fridge. A huge perk of the duct tape solution is that it prevents the control knob from being turned to “off” by curious toddler hands. For anyone wondering: yes that did happen, and we were very lucky the freezer was mostly empty when the food thawed and spoiled.
Update

It has been around two years since we spray painted this chest freezer, and the paint has held up very well. The picture above shows the current condition of the freezer. The only places I have noticed any wear is on the top of the lid and on the drain plug. The drain plug paint is scratched from being rubbed by my cordless vacuum repeatedly. The top has a few scratches from piling random junk on top of the freezer the past couple years. Overall I am still very impressed with what an upgrade this paint job was for this freezer. I would definitely recommend painting your chest freezer to fit in with your kitchen!
